Companies
Learn Joomla from Scratch
If you are new to Joomla! And you have never used it before; it is good you can learn it here. Joomla is a fast growing web application written using PHP, hence you need a webserver to run it. To learn Joomla you just need to convert your computer into a webserver, and install Joomla on it. Installing Joomla is pretty simple, and you to follow the below steps.
How to install Joomla?
You need to install webserver with PHP and MYSQL. Installing a webserver manually is very painful and can easily be done by the help of a free 3rd party tool known as XAMMP. It is a free tool that helps you to install an apache webserver, PHP and MySQL on your computer. You need to download and install it from the link www.apachefriends.org/en/xampp.html.

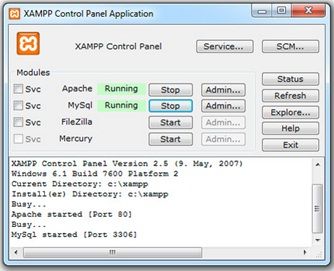
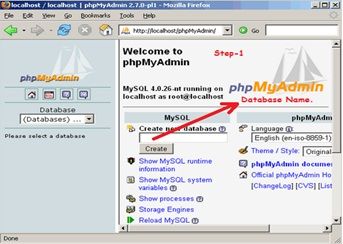
After you have installed XAMMP on your computer, you need to navigate Start--> All Programs--> Apache Friends--> XAMMP control Panel and click on the start button for Apache and MySQL. Now you need to create MySQL database and Account for installing Joomla! You can use a webserver application knows as ‘PhpMyAdmin’, to use PhpMyAdmin, just launch your browser and open http://localhost/phpmyadmin
Step-1

On the front page, you will find the following option to create database. Enter the name of your database you like and click on create. Please note the name you have entered above in step-1, you will require it while installing Joomla!
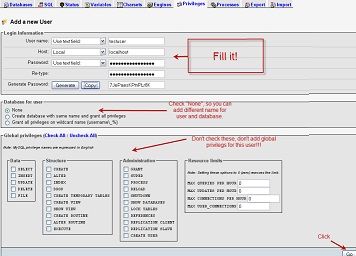
Step-2

Now it’s time to create MySQL user account. Navigate to Add a MySQL user on the front page, click on ‘Privileges’. Then click on ‘Add a new user’, fill up the form to create an user as shown in above screen.
Installing Joomla! Now that you have already with PHP and MySQL, which you have just created above, let’s install the Joomla! CMS. Download the latest version of Joomla! From Jooma.org

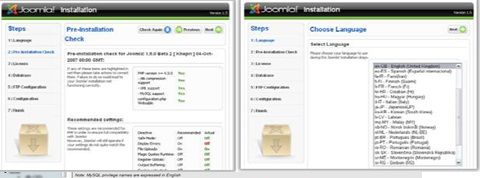
Step-1 Joomla Installation
Save the zip file in root directory of the webserver, it should be like “C:\xampp\htdocs\” make a folder ‘NewJoomlabeta’ and extract the archive in it. Now you can access the file from your web browser by typing address “localhost/newjoomlabeta”, it will show you the installation screen, select the language you want for the installation, and then click ‘Next’.
Step-2 Joomla Installation
On Second Screen will see all the settings of the web server, asking for user name, Host etc.
Step-3 Joomla Installation
Third screen is just the license agreement which you need click ‘Next’.
Step-4 Joomla Installation
Fourth screen is very important for us, this screen specify database setting, username and password. You need to enter the user name and password which you have noted in the first step.
Step-5 Joomla Installation
Fifth Screen will show you the FTP(“File Transfer Protocol”) settings , say ‘No’ and click next.
Step-6 Joomla Installation
Sixth Screen will specify administrator password and site name, you can fill up the site name, administrator email, password and install sample data. As soon as you click sample data you see a message saying “Sample data installed successfully”. Now click ‘Next’ and finish installation.
Congratulation! You have successfully installed Joomla on your computer. Read the next post ‘How to make a successful website using Joomla!”
